|
|
|
|
Home →
Survival →
Fire →
Two Stones
Two Stone Fire Starting
by
Allan "Bow"
Beauchamp |
| |
|
This article has been written with the intent of
allowing the reader to have the best information to successfully
develop the art of starting a fire in the wilderness. This is a
skill which can be learned once the individual understands what is
needed to accomplish this task.
I have currently used twelve combinations of starting fires. I
will explain three of the combinations in this article.
I remembered a time when I felt that starting a fire by
friction was the greatest gift to man from the creator. I had done many
fires with friction, and did not wish to get too complacent, as many do,
once they have a primitive skill that seems to make many sit up and
notice.
My preference is to learn the first exercise; then move on. I
have found by doing this, each lesson learned has something to offer to
the next.
This was the case with this fire starting lesson. The answer I
sought did not come from the stones for fire starting, but rather, another
idea I was working on at the time. At that time, it seemed a very
unimportant skill. Now I know without it, I would not have found the
answer about what I had been seeking for from the stone fire starting
method.
I had tried for many years to make the "two stone" fire method
work, but it had always failed! I could never seem to sort out the actual
technique that was needed. Any time I had heard of someone actually seeing
this method work, I would ask them what they had seen. But, it always
seemed that some other variable was involved with this fire starting
method.
No one I had heard of knew of using just two stones and
natural uncharred tinder. Anyone I had spoken to, who seemed to know of
this skill, had always mentioned some kinds of stones, but when I tried
these combinations it never seemed to happen the way I had expected.
Some of the ideas that people had mentioned to me in passing
(looking back at it now) were really short on the real skills to develop
this system. Not one person, that seemed to have an idea about it, ever
showed this to me. It always seemed to be, "use two pieces of pyrite and
birch tinder and strike the stones together. Then you will have fire!"
Boy! That sounded easy. I can assure you, this was not the case. Starting
a fire with stones takes much more understanding than by just striking two
stones together.
It was like the time someone had told me about starting a fire
with two sticks. "You just rub them together!" After learning the fire by
friction methods, I now know that person was "short" on skills, also.
But, I always give credit where credit is due. If these people
had been right, I might not have tried so hard to develop these
methods! |
| |
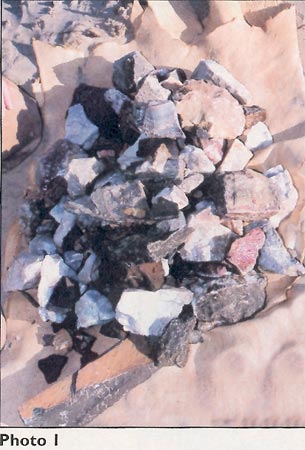 |
Photo 1 will show that when I decided to figure this "two stone" fire method out, I
tried to find as many different types of stones from around the area that
I could. I remember going to great lengths to find what I thought would be
just the right ones. Thinking, perhaps, it was a specific type, I would
find another piece identical to it. Even though the shading would be
different, I would collect it anyway and try it. I tried all sorts of
stones; I'd look for a piece buried in the ground thinking that perhaps it
was a better sample than the piece I had collected on the surface. Then I
expanded on the idea that each location offered different characteristics.
I remember thinking that perhaps the weather had a profound effect on the
texture or even the hardness of the stones. I tried taking into account
just about every factor I could think of. |
|
| |
|
After trying many variations, samples and combinations, I
actually started to believe that it couldn't actually be done. I had, from
time to time, gotten lots of "flash," but nothing of a really hot spark.
Figuring my skills were hopeless in finding an answer, I had moved on to
other projects for a while.
Then one afternoon while sitting in the bush, I was working on
something totally unimportant, (I thought so anyway). I had put together
something that made me stop and think. I remembered some of the problems I
had in trying to develop my "two stone" fire starter. My stones would
always flash, but with no real spark, and the dirt that accumulated on the
tinder was so heavy that the tinder would not accept a spark, let alone
allow it to turn into a coal.
Hopefully, with this new idea, I now had a new avenue to
explore, and it would solve my problem. |
| |
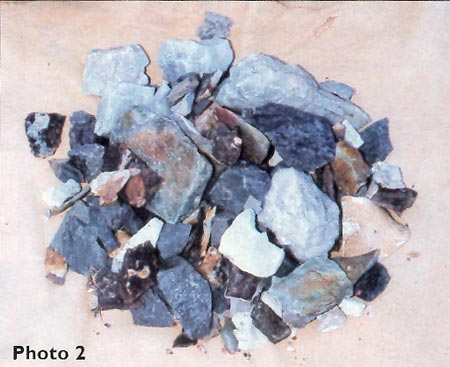 |
In Photo 2 we see
another pile of stones that I had collected from anyone I could find
who had different stones than I had originally found in my travels. I
was thinking I could put it all together with these combinations of
stones. My next challenge was that I needed the right tinder to catch a
small spark. I had. been doing some experiments with tinders for a long
time. My preference is to use my knife as a fire starting tool. But if
this was going to work, I needed the absolutely best tinder I could
find. |
|
| |
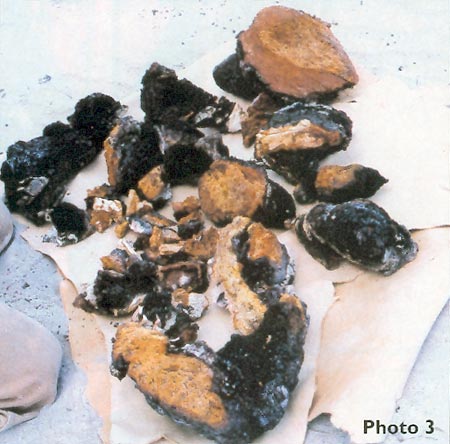 |
Photo 3 shows the tinder from a birch tree. I had done some
experiments with birch tinder over the years, and had concluded that
this particular type of tinder will depend on where and when you
harvest it. What I needed was tender with the best possible
characteristics if the "two stone" technique was going to work. |
|
| |
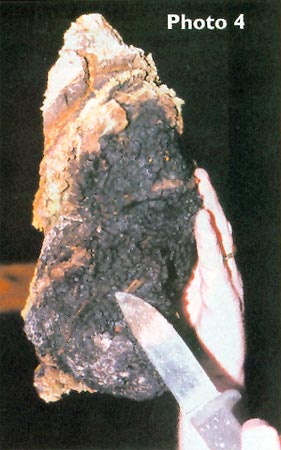 |
Photo 4
shows a close up of a fungus found on the birch tree. In the photo we
see the exterior side of this fungus. |
|
| |
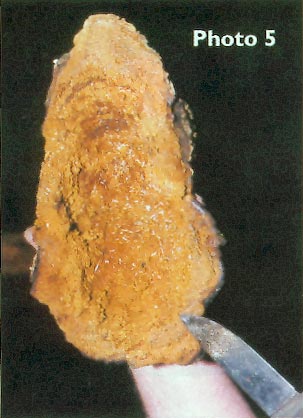 |
Photo 5 shows the
interior side of the same fungus (note the interior
colors). |
|
|
|
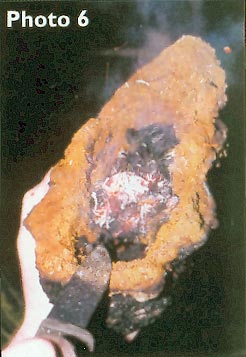 |
In Photo 6, we can see that,
with any spark at all, this particular fungus is a great fire tinder. |
|
|
|
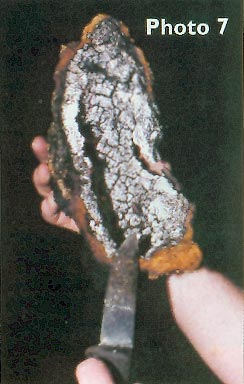 |
Photo 7 shows what it would look like if it was left to glow for
awhile (30 minutes). It is still a good sustaining tinder bundle.
So, with a couple of years of experimenting with tinders and
techniques, and then finding the right place and time to harvest tinder
fungus, I felt that now my "two stone" method might work. It was time to
put all of my components together and make this method work.
The handstone I had found that had worked the best for me
initially was a stone named pentlandite from the pyrite family. |
|
|
|
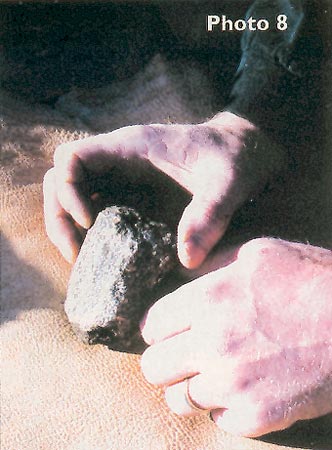 |
Photo 8
shows this stone. The second
stone I had used in combination with the handstone - "the striker" - is
identified as quartz rock. |
|
|
|
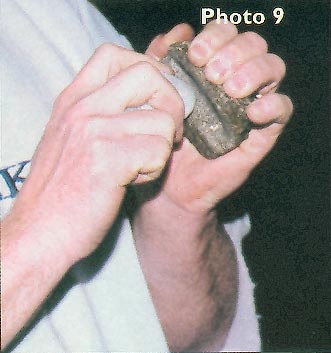 |
Photo 9 shows the "striker" (quartz) and
"handstone" (pentlandite) together. |
|
|
|
|
Understanding the many mistakes I had made and learned from in
the past and using these new techniques, I now believed it would work. So,
I tried it. To my amazement, it worked! It had almost seemed too easy.
Then, I tried it again. The same results happened. Why was it so hard for
me to accomplish this before? I was excited, and kept trying it again and
again. Each time was a great success, It worked every time and it seemed
that I could do no wrong.
Let me tell you, that the first fire I started with two stones
was very humbling. I realized at that moment how little I actually knew
about fire starting. I kept trying it, over and over, for fear of
forgetting it.
I called a close friend of mine to come and see this new skill
of starting a fire with two stones. Just before he got there, I tried it
again, but it would not work. Nothing I did would give any results. I was
persistent. I tried so many times I wore through the stone before I gave
up. The two pieces of stone in my hand broke from being hit so hard. I
began to believe that I would be the only one to have seen this
skill work.
That put me back to the drawing board. I had made it work at
first, but now I could not! Why? That question kept me up for many
nights. |
|
|
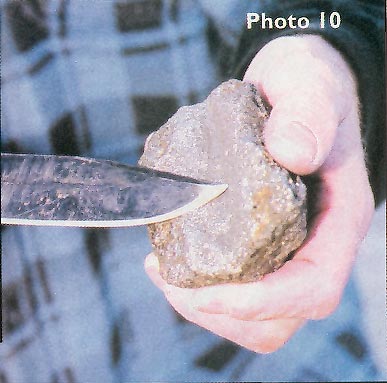 |
Photo 10 shows my first results. When I struck the stones together initially, I had gotten
flash, but no sustainable spark. The photo shows that with this
particular handstone, I had made a groove that would allow the
striker section, when hit, to focus its intensity in one specific
area all the time. The potential spark was also sheltered from the
wind, thus allowing it time to develop before it actually got hit by
the elements - a major advantage. Then the spark, (from being
directed down the channel within the grove of the handstone) could
be steered directly to my waiting tinder. This would produce the
best results. |
|
|
|
|
It had indeed worked initially, but why had it stopped working?
I focused on all of the mistakes I had made in the past and thought about
what had worked and what had not. |
|
|
 |
Then, I realized the answer! In photo 11, the depth of the grove in the handstone had been dug deeper, and by doing so, had been made to focus
more of the spark in one specific place. The smaller angled, but more
defined channel, seemed to give me the best results. I found that this
method took less effort to get a spark without striking the stone as many
times. It allowed for more life of the handstone as well as longevity of
the striker.
Also, with less impact on the stones, there is less debris
being transferred to my tinder. Remember, this was a major concern in the
past, as my tinder was so dirty that even a match would hardly light it.
With making these changes to my handstone, I now had a cleaner surface
area to accept the sparks, and by having the deeper channel, it directed
more of the sparks to the waiting tinder.
|
|
|
|
|
The deeper channel had an advantage. It allowed for more wind
protection after striking the stones, thus sheltering the spark, giving
the maximum opportunity for the spark to get hotter. |
|
|
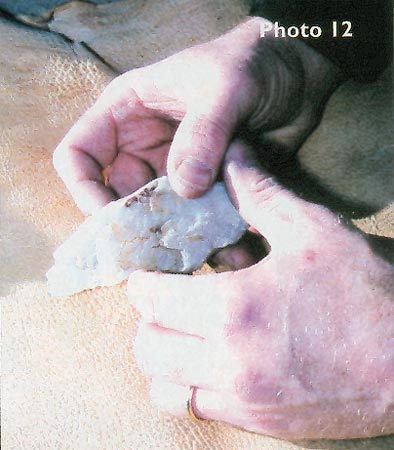 |
Photo 12
shows the striker, a crafted piece of
quartz, I had used to do these tests. The fashioning of it has a lot
to do with the longevity of the striker and the amount of times you
had to have to use it in making a fire, before you must recraft
another striker. |
|
|
|
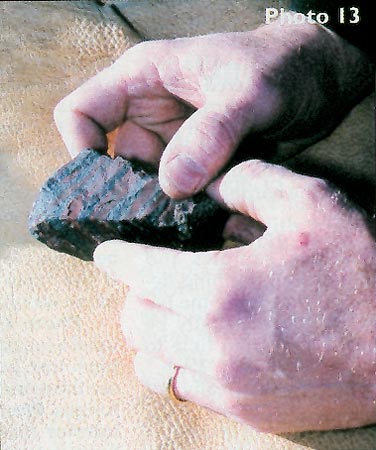 |
Photo 13
shows another striker I
have had success with. This is a piece of iron rock. |
|
|
|
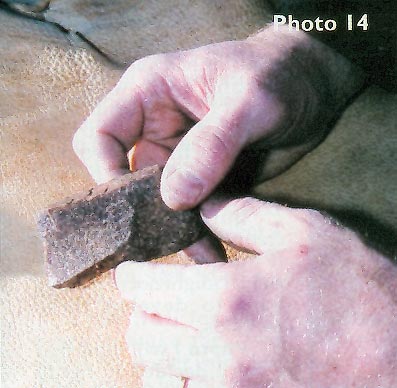 |
Photo 14 shows the
last striker we will discuss for this article. It is a
piece of granite rock. Both of these rocks are found in
this area, too. |
|
|
|
|
If you look closely at the three strikers, you will see a common
design. The tips of the strikers are crafted the same. I have found,
through trial and error, that this crafted design was one that
offered the best characteristics (not only for longevity before
recrafting, but for focusing the striker and handstone sparking
together). This allowed for the best possible sparks. |
|
|
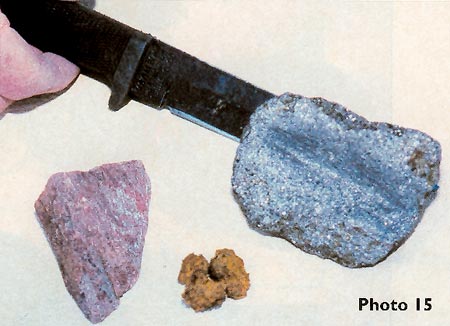 |
Photo 15 shows the
final products of the handstone, the tinder, and the
striker for the first of these combinations. |
|
|
|
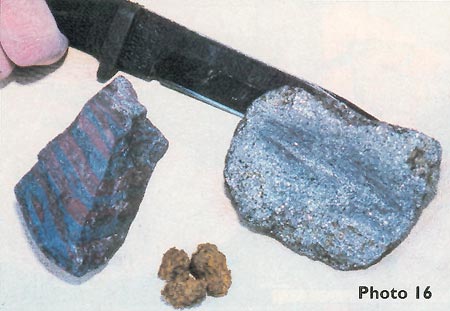 |
Photo 16 shows the
final product of the second handstone striker
combination with tinder. |
|
|
|
 |
Lastly, Photo 17
shows the third handstone, tinder, and striker
combination. |
|
|
|
|
If you view these photos, the same handstone is used, but the
strikers are different. There is a reason for this. These three work
so well together, because the strikers are harder than this
handstone. Now we can understand the reasons why I had never
gotten any sparks before with the earlier tests I had tried. My idea of striking two of the same stones together was not
practical. True, I had gotten a "flash," but nothing that would be hot
enough to make a spark. By using a striker that is a greater hardness than
the handstone, the percussion of the two stones impacting together will
send a spark from the stones to the tinder. The makeup within the quartz
(striker) has a characteristic that pulls everything together. The content
within this particular handstone that allows this to happen, (if all the
variables are considered and are just right) is "sulfur."
When you use the quartz (striker), and hit the piece of
pentlandite (hand-stone), a spark is produced. The quartz is harder
than the pentlandite. Our grove must be deep enough to allow the
spark we have made to be sheltered from the elements, giving it
maximum opportunity to survive. That is why this spark, (if
sheltered from the elements), stays hot enough to make it to the
tinder. Then the tinder will do the
rest. |
|
|
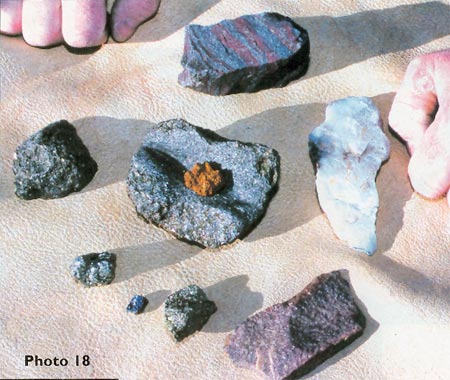 |
Photo 18 shows my
success with the "two stone" strikers! |
|
|
|
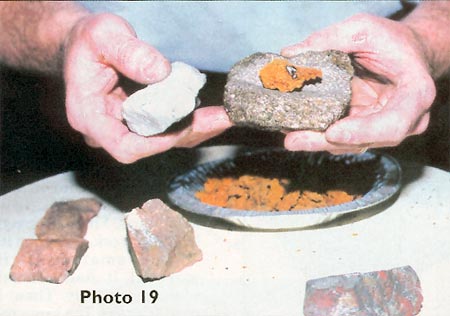 |
In photo 19, I have
used the quartz (striker) with the pentlandite (handstone)
with my finest tinder, and I have indeed, gotten the
spark to stay on the tinder. |
|
|
|
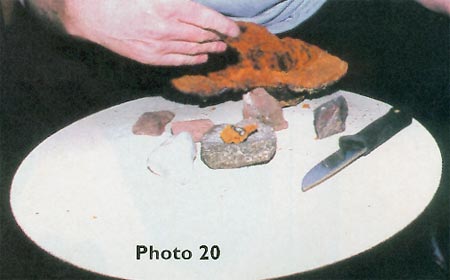 |
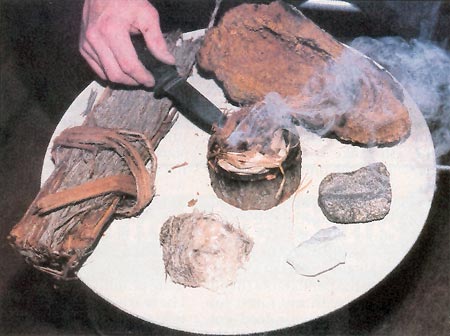
Photo 20 shows that
I am letting the coal grow, and using my hand as a fan
as opposed to my breath. The moisture from your breath,
would work against you at this point. |
|
|
|
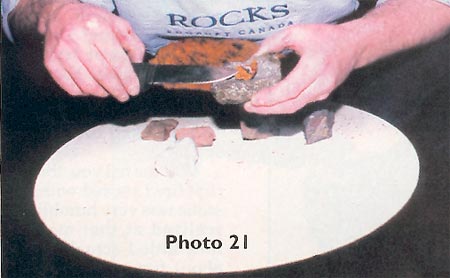 |
Photo 21 shows I am
using my trusty knife to transfer the coal to the
waiting tinder. This coal as you can see is growing
nicely. |
|
|
|
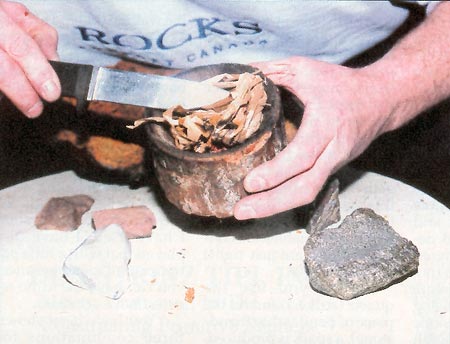 |
Photo 22 (left) shows that
I have placed this coal into my tinder bowl; then, I
have placed it in dried swamp leaves (cattail leaves).
This photo also shows that the coal is still active and
spreading well. |
|
|
|
 |
Photos 23 (left) and 24
(below)
show the complete system I have used. I have displayed
that with a little patience and perseverance, you can
have the same results I have achieved. |
|
|
|
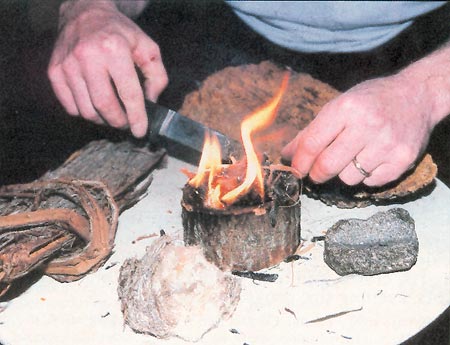 |
Photo 24 (left) |
|
|
|
|
You have been shown three combinations for starting a fire with two
stones and natural uncharred tinder. With this knowledge and using
other combinations, you can develop a system of your own. I have
since moved on with my little journey to understand primitive fire
starting methods. If we take the time to stop and listen, we will
find the keys to unlock Mother Earth's secrets. I am truly amazed at
natures bounty.
I hope I have answered some of your questions to more primitive
fire starting. I have tried to keep this article as informative and
factual as I could, focusing on the insights you can get to develop
your own system. After you learn this skill, we can expand on it
more. If I gave the readers all of the answers, it would not allow
them to have any excitement from their own findings. |
|
|
|
|
|
|
|
|
|
|
|
|