 |
 |
|
|
Home →
Survival →
Navigation
Natural Navigation, Part II
by
Allan "Bow"
Beauchamp |
|
|
|
The previous article contained the first installment about
natural navigation. Readers of that piece understand how this
basic skill could mean survival in the bush in an emergency
situation. The first article established some easy-to-observe
ways that nature assists us in finding our direction -- if we
only take the time to learn. I also stressed that all
findings/practice runs must be verified with a compass until you
are absolutely confident of your accuracy in reading natural
signs. There is always the exception to the rule, so be alert.
If you spent time in practicing these skills -- dirt time --
then this installment will bring its own rewards. We're now
going to spend some time on our hands and knees. Careful, close
observation will greatly increase your ability to observe
natural signs at a much greater distance. I am still amazed how
much I learn every time I go into the swamp or bush. Small
things will catch my eye, and I have to go and see it for
myself. Nature is truly amazing! |
|
|
|
Photo 1
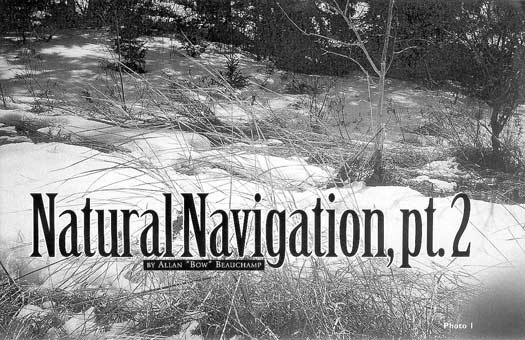 |
Let's look at photo
1. First, we see the windswept grasses. We
remember from the first article that the prevailing
winds are from the northwest in this area (northern
Ontario, Canada). (You will have to ascertain the
prevailing winds for your own area.) |
|
|
This seems to indicate to us that we are looking from a northern
direction. Secondly we see shadows, and we know that the
direction of shadows is also an indicator. Does this confirm our
first conclusion? The shadows are close to the little poplar
saplings and fall to the left side. Based on the time of day for
this photo (early afternoon), this confirms our initial
findings. We are indeed standing north of this photo, facing a
southern direction. What else can nature tell us here? At the
bottom left hand corner of this photo, we now see some pitting
in the snow. The constant sweeping action of the plant (with the
prevailing winds) will smooth the snow away from the plant. This
again confirms our decision regarding the prevailing winds for
this area, and thus the direction these plants indicate. |
|
|
|
Photo 2
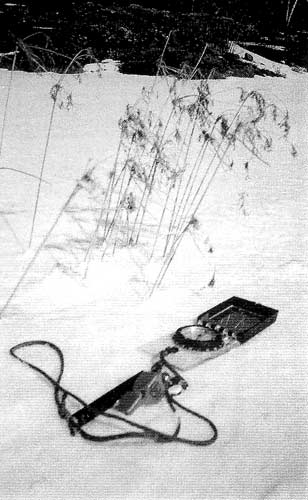 |
In photo 2,
what is evident? Look at the direction small grasses
point in the wind. Also, in the background, we see a
rock. The snow has melted from this side. From the
last article we remember two things about rocks:
that the hottest (southern) side will have snow melt
first, and that lichens prefer to grow on the
hottest/southern side. The compass in the photo
confirms our findings (the mirrored end is toward
the north). When looking for natural indicators,
we want to look at both the foreground and
background, near and far, and use two or more
techniques that compliment the other. Using many
natural indicators gives us the greatest certainty
of coming to the right conclusions.
Remember the hands-and-knees time promised you?
Let's look back at photo 1 and see if we
missed anything. At the bottom of the plant, we see
how the snow is being mounded at the base of each
little plant. (When viewed up close, on your knees,
this would seem more prominent.) This snow is piled
as a result of the prevailing winds. Does the side
that faces the sun (south) have less snow? You
should now start seeing how all are connected. |
|
|
|
|
Photo 3
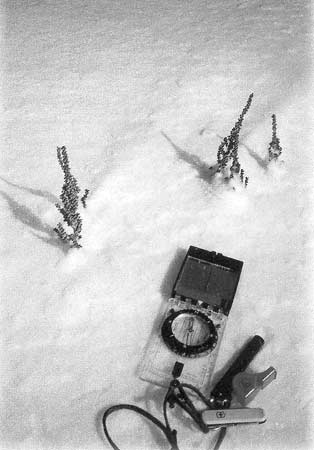 |
The three little
plants in photo 3 have much to tell us if we
stop to observe. First and foremost, we see a
shadow. Knowing the time of day, this is an obvious
clue. If at this point you still need the compass,
it is okay; soon this should be elementary. When
we examine the snow beside the plants, we see that
it has formed a natural ridge. This assists us in
seeing the prevailing wind direction. Now as you
walk across the windswept areas, you will have
something else to view and add to your list of
natural indicators.
At the bottom of these three plants, we again see
that the snow is more on one side than the other.
Now the terms "windward" side and "lee" side have
new meaning for the navigator. If we again study our
little indicators closer, we will see small
particles that have fallen from this plant and will
blow away in the wind; these will be on which side?
Again these small, minute indicators are best viewed
from as close as you can get to them. While walking
past, pause for a minute on one knee and you will
gain insights into these as direction indicators. |
|
|
While the shadow was the most obvious indicator, it was
dependent on a sunny day. The snow ridging and blown
seeds/particles would have been evident any day or at night with
artificial light. Let's talk about the shadow again. Are the
shadows cast by these three plants short or long? Can we use
this as a time estimator? If you were to recall from the
previous article, we know that the sun this time of year follows
a southeast to southwest path. If we stayed at the three plants
all day, we would observe the sun being cast along a line from
west to east past the plant. As mentioned in the previous
article, this was the basis for the shadow tip method. But this
would take a full day and, at this point, we want to examine
some techniques for short observation stops. It is possible we
can simplify this technique to save some time? Will we still be
accurate? Let's say we use the little ridges in the snow as a
quick direction indicator following the same principles as the
shadow tip method. When we view the compass we can see that the
snow-formed ridges were made as the wind swept along the surface
of the snow in the northern direction. The sun has cast a shadow
over our little plant, and we observe this to be in a westerly
direction.
As the sun rises in the east, the first shadows will be cast
towards the west. (Is this a hint as to the time of day for this
photo?) Since we are so far north, and the sun shines from the
southeast to southwest as the day progresses, all shadows cast
will move from the northwest to northeast as the day progresses.
The shadow we see is on the westerly side and the windswept
ridge formed from the prevailing winds is in a northerly
direction. This will give us our walking shadow tip method. |
|
|
|
Photo 4
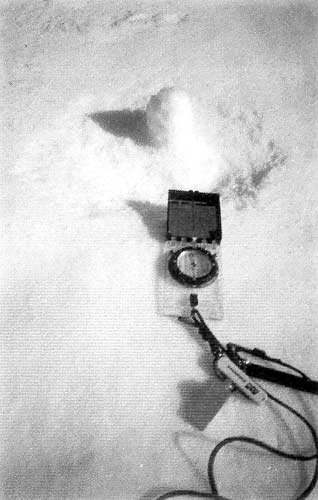 |
What if you're where
you can see nothing but snow? Photo 4 has the
answer. Here you see a snow pile made for training
purposes. Look, an instant shadow indicator. While
your body obviously also casts a shadow, it is not a
stationary object. To mark the path the sun is
traveling, you need a stationary object. This has to
be the easiest-to-make indicator ever. |
|
|
|
|
Photo 5
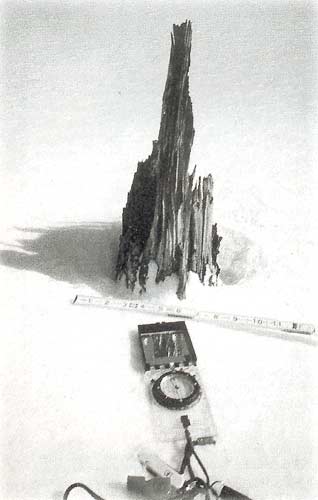 |
Photo 5 shows a
stump. As this is early in the day, the shadow is
cast to the west. What if I hadn't told you the time
the photo was taken, could nature provide us with an
answer? Well, let's find out. The stump here is a
very plain stump, nothing special, right? Well, the
shadow being cast by it points to the west, or does
it? Because the compass says so? What if my compass
was sitting on a big mineral deposit just under the
snow? Let's prove that all things are working
correctly.
One thing I would always stress is don't trust
just the one thing. Trust the many things. That will
give you the right answer.
First, the stump has more snow melted on one side
as opposed to the other. This can be confirmed with
my folding ruler. We know that the sun is hottest on
the southeast to southwest side. This will cause
more melting on that side.
Secondly, as the sun rises in the east, the
shadow gets cast to the west. If the shadow is being
cast to the east, then it will be an evening shadow.
If the shadow is more of a circle formed around the
bottom of the stump, this concludes that it is more
around noon. Simple, Ah! No magic, just observing
nature's indicators. |
|
|
My hope is that now you are starting to see some of the small
natural indicators that you would have previously overlooked. A
natural navigator sees much more than the casual, untrained
observer. |
|
|
|
Photo 6
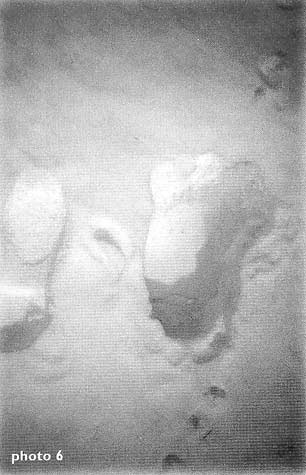 |
Photo 6 is
somewhat dark but has something to offer. What do we
see? Just two footprints, one from a man and one
from a moose. What could these possibly tell us
about direction or time? The man's footprint is
from my size eleven shoe. The moose's shoe size is
harder to guess. Just trust me when I say he is a
"big" bull moose. If you hang around the swamp much,
you will be amazed at what nature will show you.
This bull moose and I play a trailing game
year-round. Anytime I come to the swamp to study, we
are trailing each other.
The tracks show a shadow, but this time it is a
sub-surface shadow.
Now you are getting the idea of how small and
detailed you can be to navigate. As a natural
navigator, you should not overlook even the smallest
of details. Up until now, you have seen natural
indicators from walking by or by being on your
knees. To really see some, however, you will have to
spend a great deal of time on your stomach.
What can we learn from a sub-surface shadow? At
the back of my track, we see a small shadow. As the
sun will be from the southeast to south west, this
indicates that the track is heading in a northern
direction.
|
|
|
A moose is a very large animal, especially an old bull, so we
have a larger impression to study. Examine this huge print.
Remember that objects tend to be hotter on the side that faces
the sun, which is the southeast to the southwest side. The huge
print seen here is starting to distort in the heel area,
agreeing with the conclusion drawn from the human footprint that
the heel is the southern side of the footprint. This is also
supported by the shadow within the moose track. Once again, I
encourage the reader to go into the bush and practice. Only then
will you truly see what I am trying to convey. Nature will teach
you something but you have to go into her classroom to learn it.
Article and Photos Copyright
©
Allan "Bow" Beauchamp.
This article originally appeared in
Wilderness Way magazine,
Volume 5, Issue 3 |
|
|
|
|
|
 |
|