 |
 |
|
|
Home →
Survival →
Navigation
Natural Navigation, Part III
by
Allan "Bow"
Beauchamp |
|
|
|
This installment will offer more natural indicators for
orienting yourself in the wilderness and reinforce the reasons
of what, why, and how to see. We have established a multilevel
proving system that will help you become more accurate in
determining the directions, north, east, south, and west. Each
time you walk into the bush, do a primary test to gauge these
skills.
The first article was to help you identify nature's
indicators and be less likely to get lost when separated from
your equipment. The second article showed some exceptions to the
rules. As in the previous installments, the reader is encouraged
to do their own "dirt time" -- time in the bush, on your belly
if necessary, looking at the clues nature provides as to
directions. Learn to read nature, check it against your compass,
be mindful of exceptions, practice in good and bad conditions
and with and without sunlight, and internalize your own system.
Now is the time to test your knowledge and skill level. Only
practice will help you develop true confidence.
Now in this part of our training let's continue to see
natural indicators. Again, snow is used as a backdrop as it
shows so many small indicators prominently, making it easier for
the reader to see what I am trying to convey. Most readers
probably won't have snow, but you can use these natural
navigating techniques all year around, in all types of terrain
and all types of weather. |
|
|
|
Photo 1
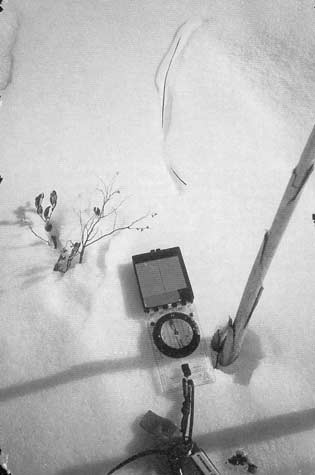 |
Remember the moose
track (Part II, photo 6)? Some of the tips learned
there will apply to objects 100th that size. In
photo 1 you will see a cattail stalk beside our
compass. The compass is set so that north is to the
mirrored side. To view this scene in the wild, you
would want to be as close to the ground as possible
(yes, on your belly). While viewing the cattail
picture, ask yourself, "What is this telling us?"
Let's ignore the shadows for now, as you want to see
much deeper.
At the top left corner we see some snow crest.
This is caused from the wind, and will assist us in
determining directions. Just as our moose track
offered sharp edges and depth as natural navigators,
all the small changes on the snow surface will mean
something of benefit to our determining the
directions. Our focus now is beyond just what we see
and into what we feel. Try not to just look at these
photos -- imagine you are at the sites with me.
Looking at the cattail base, we see that the snow
has melted more on one side than the other.
Remembering the previous articles, we know the sun
caused this as it moved from a southeast to
southwest direction. Now think if you will of taking
the cattail out of the hole and running your fingers
around the edges of the depression. Is there a
difference? What would we feel? Will the windward
side be sharper than the windless side? |
|
|
If we were to lie on our bellies and view the hole from the
ground level, would we see a slight difference in the windward
side of the hole (northwest side) as compared to the opposite
(southeast) side? For additional support of this theory, all we
have to do is look at top of the photo and view the long piece
of grass that has come loose on the snow, north of the cattail.
It would be very easy to sense the difference in how the snow is
blown if you could remove the grass and feel the snow. Which
side would be smooth and which side would be sharper?
Examine the snow crest at the top left again. Here the wind
difference is more pronounced. The rougher side is formed as the
wind sweeps upwards, causing a sharp edge. If you could get down
on the snow within an inch from the cresting, it would seem very
pronounced. Another test is by feeling. Close your eyes and feel
all the sharp edges and all the graininess around the entire
surface. Then feel how the windward side contrasts with the
windless side. Now then, open your eyes and view the cresting
from the wind side and again from the windless side. Stand up
after you view this and start to back up until you lose sight of
the small cresting. You will find this amazing, as to how far
you can view this small indicator from nature when at first you
would have passed this by.
If you notice a similar cresting when walking across a snow
covered lake, go on the side of the lake away from the sun and
view it, then view it from the side of the lake facing the sun.
When facing the sun, the cresting is more pronounced as we have
determined earlier.
We can use this same cresting indicator on a moonlit night.
As the moon also rises in the east and sets in the west, the
moon's shadow will highlight small indicators.
Why worry about minute indicators you have to feel? What if
you were to go into the bush at night, collecting wood south of
your camp, and suddenly you get a tree limb whipped across your
eyes, temporarily blinding you ? Could being on your hands and
knees and feeling these small indicators offer any assistance in
your time of need? Would a compass be of any use here? If you
were caught in a sudden storm and visibility was diminishing
fast, could you feel the base of the cattail and know which
direction would get you back to camp?
How about that moose track, or perhaps a deer track you find
if turned around in the woods? Could you look for the shadow in
it? Would it confirm your direction or perhaps be a time
estimator? In photo 1 we see that at the base of the small plant
the cresting is very pronounced. Again, get low for the best
view. Spend the time examining the small differences around the
plant closely. The better you understand every detail, the
farther away you will recognize these indicators. |
|
|
|
Photo 2
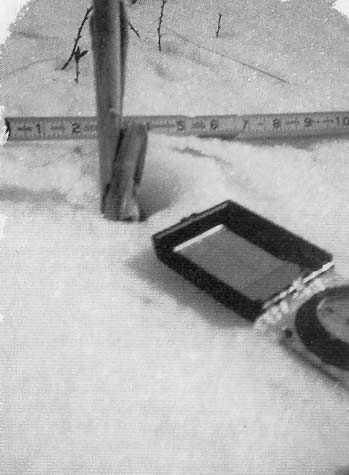 |
In photo 2 you
can see a closer view of the base of the cattail and
the differences from one side to the other. The
measuring tape helps illustrate the distortion from
one side to the other. Again, as with the moose
track in the last article, there is a "leaning"
towards the southern direction. Remember that the
prevailing wind in this area is from the northwest.
In the background behind the cattail stem, you will
see small twigs that have also succumbed to this
wind. |
|
|
|
|
Photo 3
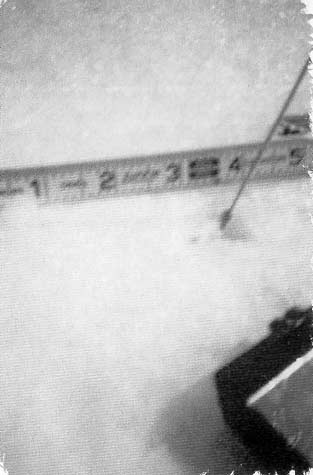 |
Even smaller than a
twig, a single blade of grass in photo 3,
serves to guide us. Again, the compass is set with
the mirror in the northern direction. Obviously, the
smaller the guide, the closer we will have to get to
see and feel all that nature has to say here. |
|
|
|
|
Photo 4
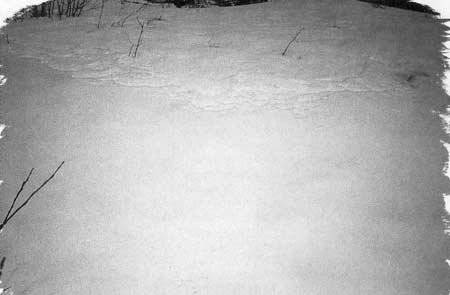 |
In photo 4 we
see a more detailed view of the wind working the
surface. Notice the differences in the surface. The
more attention we pay to very fine detail, the
easier it is to hone our viewing skills and
determine our direction more accurately. |
|
|
|
|
Photo 5
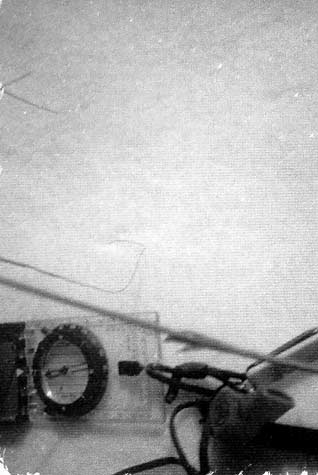 |
In photo 5 we
see beside our compass a small piece of grass that
has blown back and forth all day. The wind has
caused this small grass to etch a mark into the
snow. If you stopped for a five minute sitdown on
your long journey, would you be aware of this small
indicator? You should be aware of it now. |
|
|
|
|
Photo 6
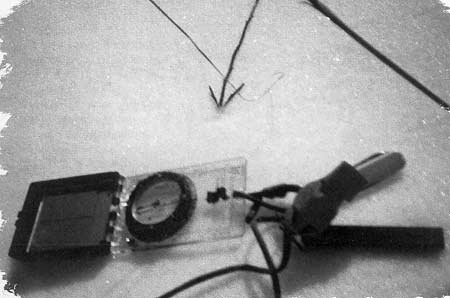 |
In photo 6 we
see this small natural indicator highlighted with
our arrow pointer. When you are on the ground
resting, they should be easy to see. I have been
quoted as saying "you should be able to go into the
bush at any time, no matter what the weather or the
time of day, and find ten natural indicators to
guide your path." |
|
|
|
|
Now when you look back at previous articles' examples, ask what
more you see in them. As the lessons have progressed and you
have practiced, more small details will become obvious. I have
been trying to give you something to mentally visualize. Now it
should start to become easier. Take the time to review this
series, starting with the question of why natural navigation is
important. What benefits does this offer me as opposed to
manmade tools? When you did your first practice test, what was
the result? Now do the test again, and see what you have
learned.
I first showed you how to view natural indicators in passing.
Then I talked more of the short stop type of indicators and told
you about a variety of techniques and how they could be combined
to confirm each other and provide you with more options. This
would maximize your opportunities for a safe trip home. With
this article, I tried to make you more sensitive to the minute
changes around you.
With this in-depth approach I tried to interest you in
feeling the changes so as to better visualize and experience
these yourself. All of these techniques are, of course, no good
to you if you do not go into the bush and develop your own feel
for these ever-changing natural indicators. Practice will
increase your accuracy immensely.
You weren't born with a "sixth sense". However, as you learn
to natural navigate, you can walk around the bush with your
friends and tell them the direction accurately with no manmade
tools. I wonder what they will say ...
I hope you have gained a more in-depth view of nature's
mini-navigators, which you can put into your own cache of
experiences. Nature will never steer you wrong.
Go out into whatever kind of bush you have and look for clues
as we have tried to demonstrate here. Soon you will see that
even if the vegetation is different, the indicators are always
there. You will have to go and seek them out (dirt time). Start
simple. Notice the easy indicators first. Then go to
"multi-leveling" to determine if they confirm each other for
better accuracy.
When you walk through the bush after a storm and come across
a deer bedding spot, take your compass out and confirm what you
will probably now know. On the same walk, after a storm, look
around and note if all the trees are wet on one side. If there
is a distinctive dry vs. wet side to trees, you will know the
prevailing wind direction for your area. Once the direction of
the prevailing wind is known, this is an easy indicator for the
bush traveler to follow. Is the bark on the harshest weather
side going to be thicker than the side that isn't as harsh? Do a
test. Go experience this.
Remember lessons from sunlight in the earlier installments.
If you took that wet tree and cut it down, would the rings of
the tree be thick on the side that gets the most amount of
sunlight during the day? Always remember to combine indicators
for the best result.
Article and Photos Copyright
©
Allan "Bow" Beauchamp.
This article originally appeared in
Wilderness Way magazine,
Volume 5, Issue 4 |
|
|
|
|
|
 |
|