|
|
Home →
Survival →
Shelter →
Thatch
Thatch Hut Construction
by Ryan Leech
(Text and Photos by Ryan Leech)
|
|
|
|
A thatched hut is a warm and wonderful shelter that is waterproof. It can
stand up to strong winds, allow for an internal fire, and can be used in
the winter. This hut that I built was put up in 2 days, but could have
been easily put up in one had I woke up early and took no breaks. The
inside was 6 foot tall in the center and about 6 feet in diameter. This
shelter was constructed in New York state, USA.
Enough talk about the shelter, let's build it!
|
|
|
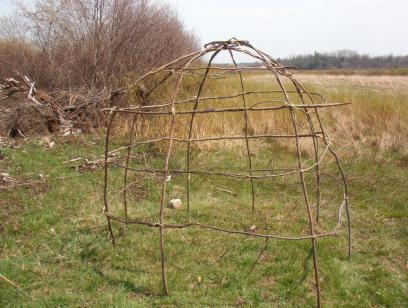 |
The first thing is to build a frame out of some
bendable saplings. This frame was built with 8 saplings about 1½
inch in diameter at the bottom. I pounded a stake into the ground
with a rock, then stuck the sapling in the hole. (The hole was 6-8
inches deep) Opposite saplings were tied together to form the
vertical framework.
The next step is to attach horizontal saplings to
the frame. These can be smaller in diameter but fairly long. These
horizontal saplings were each about 18 inches up from the level
below, but they could be larger or smaller depending on how tall the
grass is that you are working with. I left a gap in the bottom
horizontal level between two vertical saplings for my door. |
|
| |
|
|
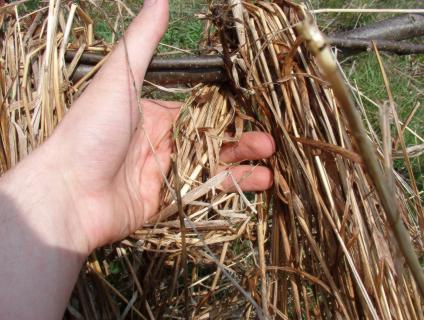
The next step is not as hard as you think. It will
take a lot more time in the collecting of the grass than the actual
thatching to the frame.
I start by collecting the grass and grabbing a good
size bundle. I take the bundle, roots side up, and wrap ¼ of it
around a horizontal piece. Then I slide it over tight against a
vertical stick. The next bundle is wrapped again and slid tightly to
the first. |
|
| |
|
|
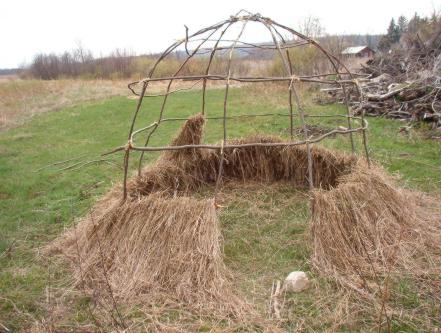
This continues around until that layer is finished.
(Make sure the bundles are slid tightly together!) |
|
|
|
|
|
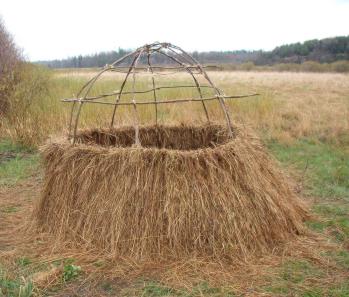
Then start the next layer and continue until the hut
is finished. |
|
| |
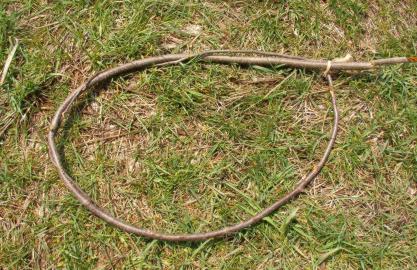 |
The top is a little difficult when you get there. I discovered to form a
small loop (8 inch in diameter) with a sapling and lash it to the top. You
then attach bundles of grass to this loop as you have done for the
horizontal ribs.
This allows for easier watershed on the entire shelter once it is
thatched. I worked from the inside as I got closer to the top. A ladder
could be used if the frame was strong enough. |
|
|
|
|
|
|
|
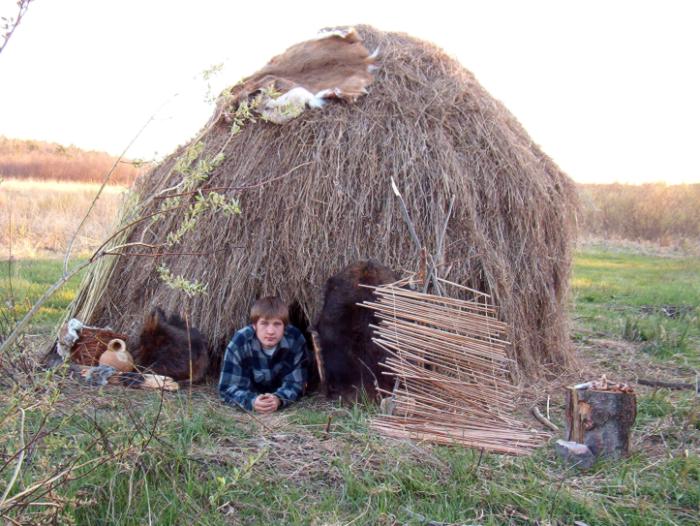
| I was very happy with my stay in my hut. (Please ignore
that cattail backrest, it was in good shape before my little cousins
fought over it.) I often laid down in it and just stared at it, amazed
that I made it with no modern tools or help from anybody. I thought it was
a wonderful experience to make a thatched hut and I encourage anyone to
make one. You will not be disappointed! |
| |
| Photos and text Copyright © 2003 by Ryan
Leech. |
|
|
|
|