|
Now in most parts of North America, the most
easily collected survival foods are wild plants. However, since many
native vegetables aren't available in the winter months (and because
most regular MOTHER-readers already have a pretty fair grounding in
edible plant indentification), I've decided to discuss methods of
gathering animal foods here. And the techniques that I'll
focus on are hunting (with a simple throwing stick) and trapping.
HUNGER IS THE BEST
APPETIZER
Naturally, when eating is a matter of life or
death (as it could be if you were stranded for an extended period of time), an individual can't allow his or
her dietary preferences to get in the way. You should know, then,
that virtually all mammals are edible (in fact, when skinned and
cleaned, very few animals can't be safely used as food). It's
important, however, to avoid eating any creatures that show signs of
sickness . . . and, if possible, to cook all meat (usually either on
a spit or in a crude stew) until it's well done. Remember, too, that
such protein sources as grubs, grasshoppers, cicadas, katydids, and
crickets shouldn't be passed up!
THE MOST PRIMITIVE
WEAPON
A basic throwing stick is, quite simply, a
sturdy hunk of branch. The optimum size and shape will vary
somewhat, depending upon personal preference, but I like a stick
about 2-1/2 feet long and approximately half as thick as my wrist.
Of course, some primitive peoples have turned the making of throwing
sticks into an art form (consider the Australian kylie, or hunting
boomerang, which is carved to an aerodynamic profile that actually
allows it to fly farther than an unshaped stick of similar size
and weight could be thrown). But for our purposes, we'll be
discussing the handling of a weapon that requires nothing more,
perhaps, than being broken to a comfortable length before it's put
to use.
Such a basic club can be thrown either overhand
(when, for instance, you're trying to knock a squirrel from the side
of a tree) or sidearm (when you're in an open area, where brush
won't interfere with the stick's flight). In using the first meth
od, point your left foot at the target (if you're a right-hander
southpaws can simply reverse these directions). Then, holding the
smaller end of the stick loosely in your right hand, bring the
weapon back over your shoulder and hurl it, with good end-over-end
spin, straight at the mark. At the moment of release, your
shoulders should face the game squarely.
The sidearm throw is similar to the motion used
in stroking a tennis ball with the racket. Point the left toe at the
animal, bring the stick to a cocked position at your side, and throw
it . . . squaring your shoulders and snapping the club—as if you
were cracking a whip—to give it spin.
Always be sure to carry your throwing stick
when away from camp for any reason. Not only is there a chance that
a small bird or animal will suddenly appear within range, but
there's also the possibility that you'll encounter other food
sources (say, nuts or fruit) that can be knocked down with the club.
I don't have the space to go into any detail
about stalking techniques here. In general, you should avoid any
abrupt movements . . . walk slowly, feeling the ground (or, perhaps,
a brittle twig?) beneath each foot before putting your weight upon it . . . and try to time your
movements to coincide with the feeding patterns you observe in your
quarry (most animals will alternate regular periods of feeding with
pauses to survey their surroundings for danger). Remember, though,
that this is a very rudimentary outline, and that—as always—the time
to practice this particular survival skill is before you need
it.
THE THREE TOP TRAPS
There are probably well over 100 traps that can
be fashioned-using primarily foraged materials—in a wilderness
setting. But although any student of outdoor survival would be well
advised to acquaint him-or herself with as many designs as possible,
I consider the rolling snare, the figure 4 deadfall, and the Paiute
deadfall to be the most easily made and versatile of the
lot.
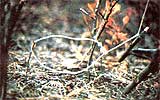
A snare, as you may know, is little more than a
noose—fashioned from wire, string, sinew, or handwoven
cordage-positioned in such a way that it can "lassoo" an animal. The
rolling snare, in particular, is placed directly along a
well-traveled animal run or trail. When the beast unknowingly puts
its head through the loop, the trigger is released, and a sapling-to
which the noose is tied-whips upright, often breaking the animal's
neck and thus killing it instantly. You must, of course, be
selective when choosing a site for your snare . . . if it's set on a
trall that's used by animals larger than those you're after, they
might blunder into, and destroy, the device.
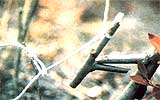
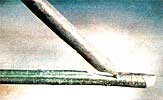
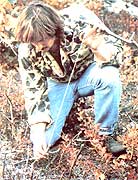
The rolling snare is one of the easiest
survival traps to set up. And, because the pressure points on the
trigger mechanism (as illustrated in the accompanying photos) are
rounded rather than squared, it's not likely to freeze up during
cold weather. Be careful, though, when setting this or any snare
that depends upon a bent tree for its power, as the sapling could
unexpectedly spring up and catch you in the face.
THE FIGURE 4
DEADFALL
A deadfall is a baited trap which, when
triggered, allows a weight to drop on the animal, often—as the term
implies—killing it outright.
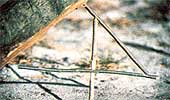
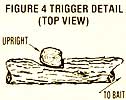
The figure 4 takes its name from the shape of
its trigger assembly and is about as simple to construct as any trap
I know of. The trigger is composed of three sticks, two of
which—when used for rabbit-sized animals—will each be about six
inches long, and the third eight inches (the sizes will vary some
with the type of animal to be trapped). The weight is usually a
large, flattish rock or a log.
The figure 4 trap should be set near trails or
established feeding areas, but—since it depends upon bait rather
than upon a beast's unwittingly stumbling into it—never directly in
a run or line of travel. Remember when assembling it that the
vertical stake should not be positioned beneath the rock or log, that the bait should be attached to
the crosspiece and as far under the weight as is practical, and that
a small fence of twigs around the "outer" portion of the upright can
prevent an animal from inadvertently setting off the device by
striking the trigger while not under the log or rock.
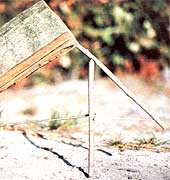
THE PAIUTE DEADFALL
This trap is similar to the figure 4, but has
the advantage of a more sensitive, "faster" trigger. Again, the
upright should be positioned well out from under the lip of the
weight and the bait—on the crossbar—well beneath it . . . and the
trap itself will be most effective if located near an area of game
activity but not actually in a well-traveled run.
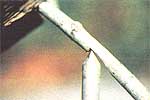
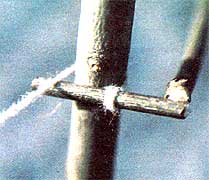
As you can see in the accompanying photos, a
piece of string, sinew, or woven cordage will be needed to construct
this trap (some threads unraveled from clothing and twisted together
will usually work quite well). The Paiute is more difficult to set
up than are the other two traps described here, but it's also the
most effective of the bunch.
TRAPPING TIPS
You've probably already gathered that there's a
good bit more to survival trapping than simply constructing your
deadfall or snare in the middle of a convenient field. In order to
obtain the best results with these do-it-yourself game getters,
you'll have to understand a little about animal movement patterns .
. . the dietary likes and dislikes of the beasts you're after . . .
and the different methods of making your structures appear "natural" so the animals'
suspicions won't be aroused.
Your most important task will be to locate
areas of high game activity, generally by "reading" the landscape.
Usually (the wilderness always produces exceptions to human rules)
the most productive areas to scout will be those around sources of
water . . . and those in edge environments, where forest meets
field, field meets meadow, and so forth.
In such a location, you may well be able to
spot specific trails, runs, day beds, lays, and feeding areas. By
doing so, you can place your trap in such a way that it'll have the
best possible chance of being encountered by the animal you're
after.
Trails are heavily used tunnels or paths. When
following such a wildlife "freeway", you should be able to note
animal scat, hair, and such that will indicate the type of creature
most often using the path. Remember, though, that even if deer
tracks-for instance-have all but eliminated any other signs from a
trail, odds are that a number of smaller animals are using it, too.
Wild creatures will follow the easiest route available unless
they're either pursuing or being pursued.
Runs are the smaller arteries that connect
established trails to feeding, bedding, and watering sites . . . and
are subject to change as food and water supplies come and go. Since
each run's use is typically limited to one species, its size will
often provide some clue to the type of animal using
it. (Traces of scat and fur, again, will help you make a positive
identification.) By following runs-carefully, causing as little
disturbance as possible to these potential trap locations-you may be
able to find the areas of animal concentration to which they'll
usually lead.
Day beds and lays are spots in which beasts seek cover and/or sleep.
Beds are generally used quite frequently (though one animal might
well have several of them), and usually appear as well-worn
depressions in the grass or ground. Lays, on the other hand, are
less obvious-often showing up as areas of partially crushed weeds or
brush-and are typically found near feeding sites. The pattern of
beds and lays surrounding a known food source can help you predict
routes of animal travel, and thus choose good locations for your
traps (this is especially true when setting snares, as your quarry
will actually have to run into such a trap to be caught).
Feeding areas-which can be located by careful observance of the signs
described already-will, for herbivorous animals, likely be locations
rich in grasses, clover, and tender new growth . . . or, especially
in winter months, young trees and brush with edible bark, twigs, and
buds.
By examining the food plants in such an area,
it's often possible to determine what sort of animals are feeding
there. A diagonal bite that cuts off a plant stalk at about a 45°
angle is typical of such rodents as rabbits and woodchucks.
Straight, finely serrated bites will often indicate that members of
the deer family have been dining . . . while obviously chewed-upon
greenery is usually a sign that predators have been rounding out
their diets-with a little plant foraging.
You will, of course, want to take special note
of exactly what food seems to be preferred by the species you hope
to catch. Furthermore, it's best to try to locate a favorite snack
that, because it has been pretty much finished off, has been
temporarily abandoned for a second-choice edible. If, for instance,
you note that all of the red clover around a group of woodchuck dens
has been eaten, and that the animals are now resorting to a diet of
grasses, it may be worth your while to scout beyond the 'chucks'
range and-if you can-bring back a batch of that rare clover to use
as bait.
"Naturalizing" your traps, in order to lessen
the chance that animals will steer clear of them, will improve your
chances of making a catch. Leave bark on the trigger assemblies, and
rub dirt on any cut surfaces to prevent them from attracting
unwanted attention. When working on a trap, be sure that your hands
are well rubbed with mint, leek, or some aromatic weed to disguise
the human scent. In the winter, it's sometimes possible to
accomplish the same result by smoking a finished trigger assembly
over a fire, and then handling it with gloves that have also been
well scented with wood smoke. (Some trappers will smear their hands
with scat, or with scent from the glands of an animal caught
earlier. The notion may sound unpleasant to you now, but there's
little room for niceties in a true survival situation!)
Once your traps are naturalized and set, be
sure to check them at least once a day . . . to prevent your quarry
from being stolen by a predator or (in hot weather) decomposing, and
to minimize the suffering of any creature that might have been
caught but not killed. Carry your throwing stick when visiting the
traps. A hard blow to the back of the head will, for most of the
small animals that you'll be likely to catch, result in a quick and
relatively painless death.
LEARNING BY DOING
As mentioned above (and over and over in this
series of articles), the time to fine-tune your survival skills is
before you have to use them. Practice reading
animal signs, locating feeding areas, and so on at every
opportunity. Carry a throwing stick on your hikes and indulge in a
little target practice . . . flinging it at stumps, clumps of grass,
and the like.
You should certainly experiment with making
survival traps, too .
. . but don't leave them set in an attempt to catch animals when
doing so isn't absolutely necessary. For one thing, you would likely
cause needless suffering and death, and -for another-none of these
traps is legal in any state . . . unless the trapper is truly in a
life-threatening situation.
Finally, remember that this article is little
more than an introduction to the subject of survival trapping. Take the
time to visit your local bookstore or library for more sources of
information, look into the possibility of attending one of the
survival courses available, and make the building and refining of
your store of outdoor skills a regular and pleasant part of your
life . . . when you're hunting, fishing, camping, or simply taking a
shortcut across a vacant lot to go to the store. Only after you
develop confidence in your own abilities will you be truly able to
feel at home in the wilderness.
For more material by and about Tom Brown Jr. and the Tracker School
visit the Tracker Trail
website.
|


