 |
|
|
|
Home →
Survival →
Containers →
Pottery
Pitfiring Earthenware
by
Anthonio Akkermans
|
|
|
This method is just one of many different methods of firing pottery. The
reason, I am describing it here is because this method seems to give the
highest rate of success on my courses, with only a rare instance of
students pots cracked. Before I used this method, My students fired
pottery in an open fire. This seemed to result in about 60% of broken
pottery after the firing, due to thermal shock (temperature changes too
quick).
First though, a small description of the science behind firing
pottery...
A number of changes occur before and during firing of pottery.
Most important is that the pottery is made without any air pockets
trapped in the walls or bottom of your pot. If there are air pockets, it
is possible your pot will explode during firing. Air expands as it is
heated, causing the explosions.
Secondly, it is VITAL the pottery is dried out, and that the temperature
is raised slowly. After the max temperature is reached and the firing
process is completed, pots need to cool down slowly. If clay heats up
too fast, or cools down too fast, the stresses imposed on the clay
become too big, causing cracks to occur. The reason for this is that
clay expands and shrinks during firing.
Thirdly, It is important that the pots are heated evenly. If one side is
hotter then another side of the pot, the shrink-rate of these sides will
be different, again causing failure.
Below a small description of what happens during different temperature
intervals:
Room temperature - 100 C. Clay is
drying out. The pots will shrink at this stage up to about 10%.
100 C - 500 C. The chemical water is
driven off. The pottery does not shrink during this phase. Although a
chemical reaction has occurred, the pottery is not yet useful. It is
weak, and will disintegrate during regular use (cooking on a fire)
However, it will never be able to return to the slippery clay you
started out with.
500 C - 600 C. At this temperature the
geometry of quartz crystals changes from one form to another that is
about 2% bigger in volume. At this point, the pottery is useful for open
fire cooking. However, the pottery is not watertight and will "sweat".
If you were to store large amounts of water in this pottery, it will
keep cool, due to this sweating. This is the stage where primitive
pottery is most useful. It is still flexible enough to allow uneven
heating (As occurs when cooking in them over a fire)
1000 C and more. At this stage the
microscopic crystals of mullite and quartz are knit together into larger
and larger crystals until the pot is pretty much one big piece stone.
Pottery at this stage is like the plates and mugs in your cupboards.
This earthenware is NOT useful outdoors. If heated unevenly, it will
crack. Luckily, it is pretty much impossible to reach this kind of
temperature using a primitive firing method.
Right, enough of the theory, let's get on with
it! |
|
|
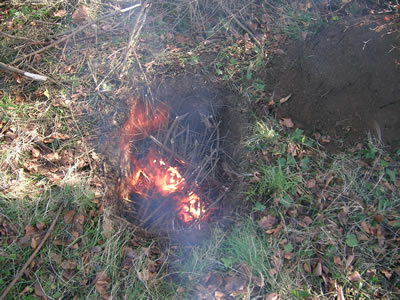 |
First thing to do is dig a pit about a
foot and a half deep in an area where there are
no pineroots or bog in the ground (you don't want to fire the
forest around you as well! Underground fires can rage for weeks
unnoticed and suddenly flare up to destroy whole wilderness
areas!!!). This hole needs to be about a foot by a foot if you only
have one small pot. Our hole is one by two feet to accommodate more
pots.
Once the hole has been dug, light a fire in it to ensure the pit is
dry inside. |
|
 |
Once this fire has burned out, fill
the bottom three inches of the pit with dry sawdust. |
|
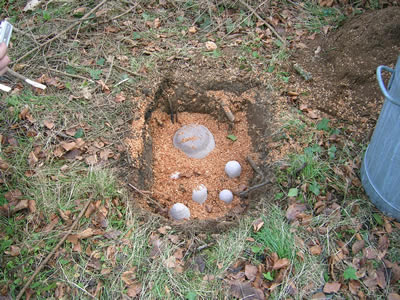 |
Lay your pots carefully inside the
sawdust. Make sure that your pots aren't touching each-other and
that they tend towards the middle of the pit, rather then the sides
where the fire will be less hot. |
|
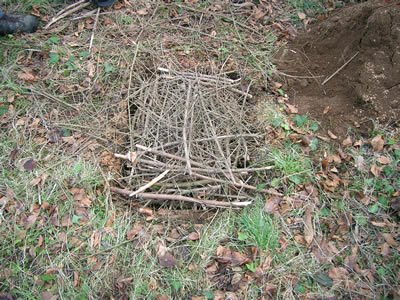 |
Now stuff the pots with more sawdust,
and put another layer of sawdust on top so there is a layer of about
1 to 2 inches above the pots.
Now fill the rest of the pits with sticks. Make a nice mix by using
kindling, "squaw-wood" and bulkwood altogether. I also like to put
the branches and sticks crosswise so there are enough gaps for the
wood to catch. |
|
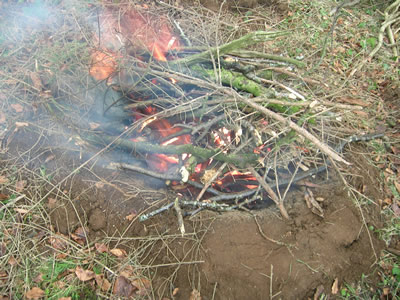 |
Light the fire from the top. |
|
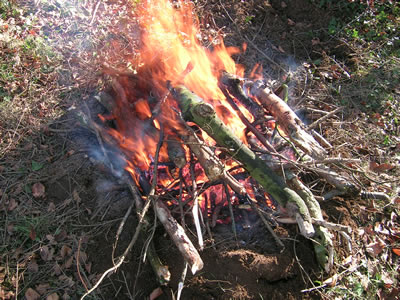 |
Now, heap as much fire-wood as you can
find on top of this fire. You want this fire to be huge! |
|
 |
Try and keep the fire well lit for a
good 3 hours. After that, let it burn down naturally. Once all the
wood is turned into embers, you might be tempted to scrape them away
to have a look at your pots. Don't. Just let the embers turn into
ashes, and let the ashes cool down overnight. The result will be
much more exciting after a nights sleep. |
|
|
|
|
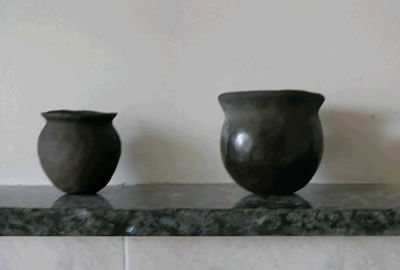
The pots are black, because there was no oxygen available around the pot.
If these pots had been fired in an open fire, they would be lighter in
colour, except perhaps where combustible material touched the pots. The
black is burned in the clay and cannot be scraped or sanded off. |
|
|
|
|
|
|
|
|

