|
|
Home →
Survival →
Fire →
Fire Pistons
Model "T" Fire Piston
Article and photographs by Rob Bicevskis
Page 2 of 3
Page 1
Page 2
Page 3
|
|
Building the Plunger - The Piston- "O" Ring
Method |
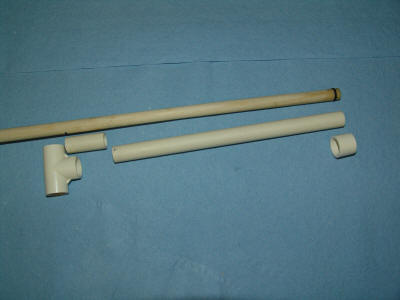 |
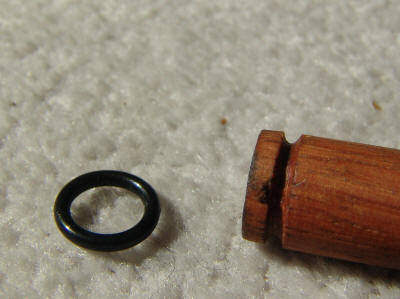
This is the
trickiest part of the whole project - the plunger
itself. We are going to use an O-ring to
provide an air-tight seal to the cylinder.
Don't cut the wooden dowel to length at this
point. It might take a try or two to get
the O-ring fit just right. If you make a
mistake, it is a simple matter to cut off the end of
the dowel and you can try again. |
|
|
|
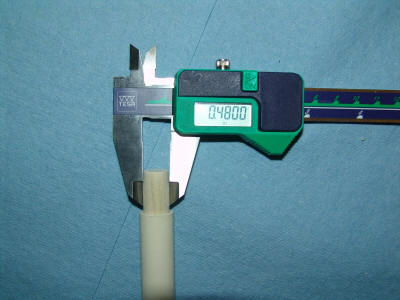 |
Step one is
to check whether the dowel fits inside of the 1/2"
CPVC pipe.
In theory, the inside diameter of the CPVC pipe
is about 1/2" and the outside diameter of the dowel
is 1/2" so there is a chance that the dowel might
fit.
(We all know that: "In theory, there is no
difference between theory and practice, but in
practice there is. " Source unknown.)
We don't want a tight fit. The O-ring will
provide us with an air-tight seal, not the wood.
Usually I have had to reduce the diameter of the
dowel slightly. |
|
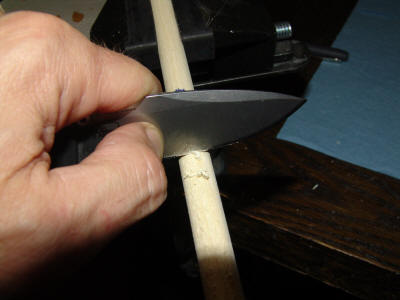 |
A knife can
be used as a scraper to remove material quickly from
the dowel.
Try to keep the dowel round during the scraping
process.
After scraping, or if the diameter is almost
correct, smooth things off with some sand paper.
Remember, the dowel needs to slide freely. |
|
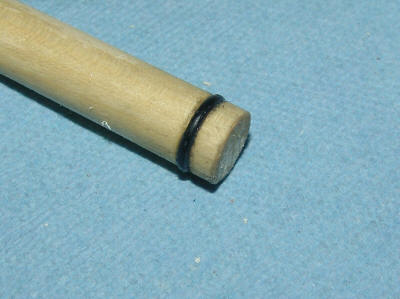 |
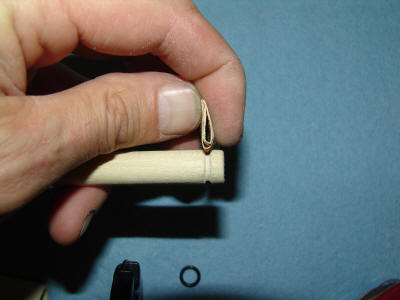
Now for the
gasket.
This is our goal. An O-ring seated in the
dowel a short distance from the end.
In order for the O-ring to seal properly, we need
to cut a groove into the dowel.
For this, we are going to make a jig. |
|
 |
Another view
of what we need to achieve. |
|
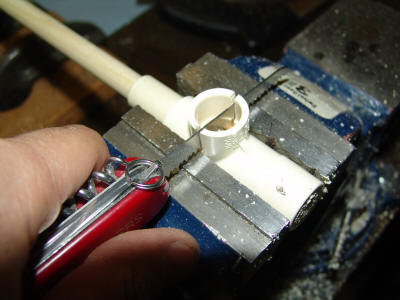 |
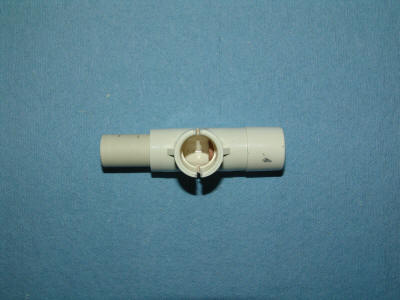
This is what
the jig looks like.
It is an assembly of CPVC pieces that allows us
to cut a very controlled slot near the end of the
dowel. The knife/saw is held stationary, and
the dowel is rotated. This forms the slot.
The width of the saw should be equal to, or
slightly less than the thickness of the O-ring. |
|
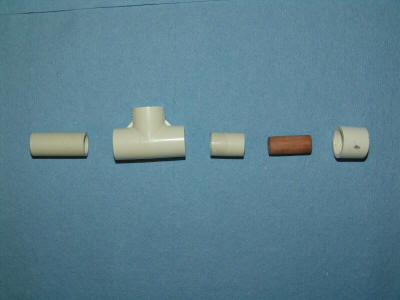 |
Here is an
exploded view of the jig.
Use the parts list above for dimensions of the
pieces. |
|
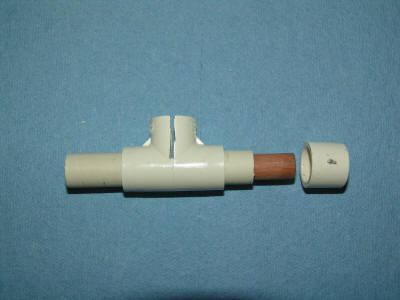 |
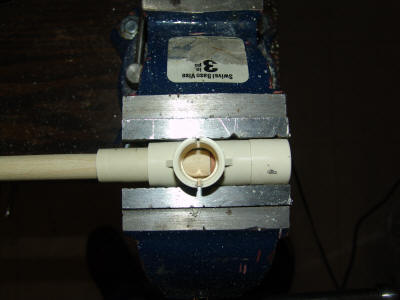
Here is a
partially assembled version of the jig. Note
the slot that has been sawn into the T-fitting.
The trick is to cut the slot just deep enough that
the knife/saw blade won't cut too deeply into the
end of the dowel. |
|
 |
A top view of
the jig.
There is no need to glue the pieces together.
A press-fit should be good enough. |
|
 |
We are now
ready to make the cut.
Cut a ways into the dowel, then remove it from
the jig and test for a fit into the cylinder.
This is an iterative process. Test, cut a
bit, and test again. At this point we are
going for a tight fit. |
|
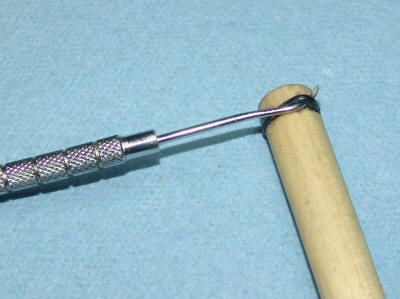 |
A dental pick
is a useful tool for removing the O-ring from the
slot.
|
|
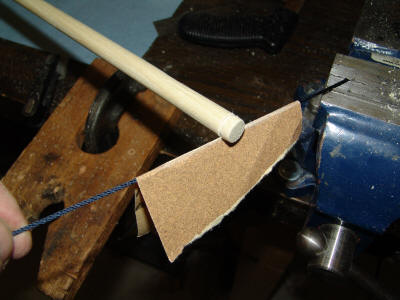 |
When dowel
with O-ring can be forced in the cylinder, it's time
to smooth out the slot with some sandpaper.
One technique to to fold some sandpaper over a piece
of string It is important not to remove too
much material during the sanding process. |
|
 |
A folded
piece of sandpaper can also be used.
Sand and retry the fit in the cylinder.
Keep sanding until the dowel + O-ring starts to
slide freely in the cylinder. You should be
able to generate a distinctive "pop" sound as you
remove the plunger from the cylinder. |
|
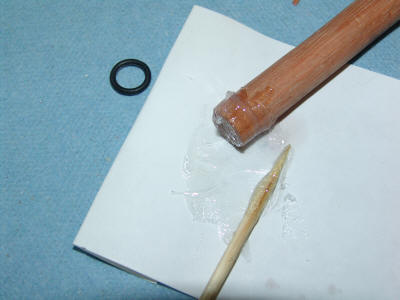 |
Almost
done....
Mix up some 5 minute epoxy and slather it all
over the end of the dowel. This will seal the
wood. Now roll the O-ring into its slot and
wipe off the all of the exposed, excess epoxy.
Slide the plunger into the cylinder and let the
epoxy set. |
|
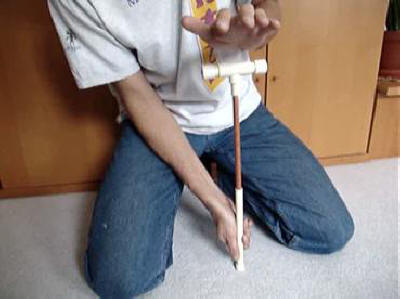 |
To get a feel
for how much friction there should be on the
plunger, watch this video: Bounce
Video.
Notice how easy it is to depress the plunger, and
how far back it bounces from the air pressure.
If there is too much friction, one won't be able to
generate enough speed to get a high enough pressure
to light the tinder. This is the biggest
factor in the success of the fire piston. |
|
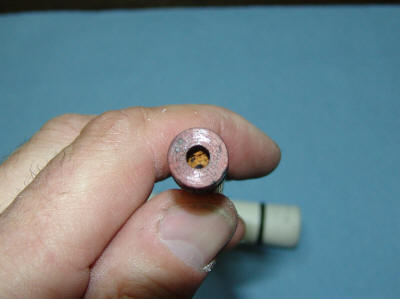 |
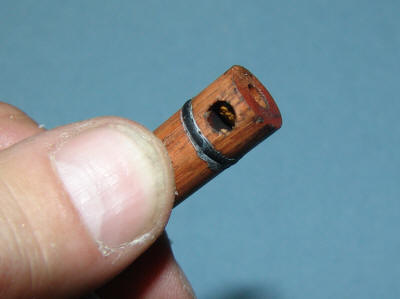
Now drill a
hole into the end of the plunger. Using a 1/4"
bit and going about 3/8" deep is a good starting
point. Since this design gives some much
volume and compression, the hole isn't all that
critical.
Note that this hole already has some tinder
fungus loaded into it. |
|
 |
Here are some
ideas for non-traditional holes. A hole that
goes across the dowel makes for easier removal of
the tinder. This particular plunger has a hole
in both dimensions. The thought here was that
the hole in the end would better expose the tinder
to the high pressure/temperature air, and the hole
in the side would make it easy to pop out the
tinder. This worked out well. |
|
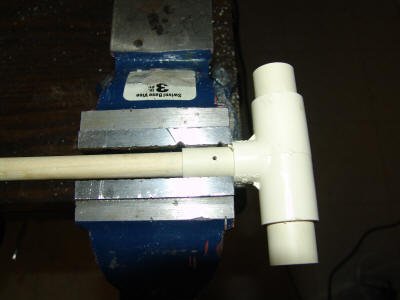 |
Now we cut
the dowel to size, and insert it into the T handle.
The length of the dowel should be such that it
"just" touches the bottom of the cylinder. Any
air-space left over is a bad thing since it reduces
the possible maximum pressure. If the dowel is
too long, it will bottom out - which is OK, but puts
greater stresses on the whole assembly. A
perfect fit isn't all that hard to do. ..... on
to Page 3 |
|
|
|
Page 1
Page 2
Page 3 |
|
|
|
|

