|
|
|
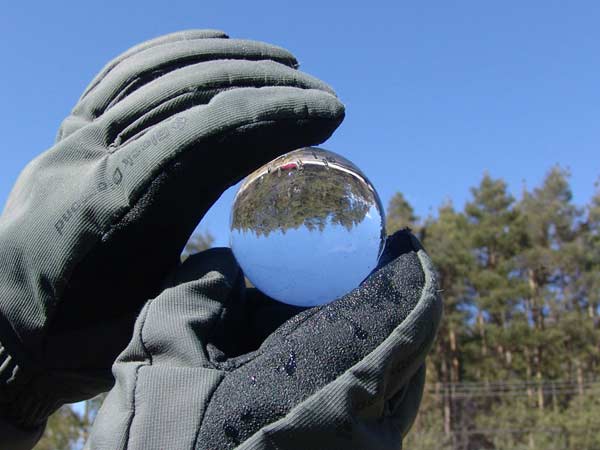
One of my latest Ice Spheres ... What does the
future hold? |
|
|
|
It was early in 2005 that
Ice #3 was published. This page seemed to generate a
lot of interest. I've been getting weekly emails from many
people around the world. Even Mythbusters (episode is
currently airing on The Discovery Channel) contacted me about
making and using ice lenses (as well as starting fires with a
Coke Can and Chocolate Bar.)
Other interesting emails queried whether primitive man or
Native Americans might have used this technique. Of
course, all evidence of the lenses would have disappeared.
Maybe a campfire conversation on a rainy/snowy day!
There have been many emails praising the
content/research/experimentation that went into this Ice Lens
series. It's always good to get feedback that people are
hitting the site and getting something from it. Not
too long ago, I got an email from Nelson Zink:
Rob,
Rough ice into a semi-sphere. Then, get a can (with lid
removed) or a jar and use the opening to quickly and
accurately
machine/smooth the ice blob into a very respectable sphere.
The
can/jar opening must be smaller than the ice blob. In general,
the sphere will end up with a diameter about 1.5 times that of
the can/jar circular opening. A can might work a tad better as
you can sharpen the edge a little bit. I use this principle to
make clay spheres.
Neat article!
Nelson Zink
After a couple of emails back and forth to clarify
things, I was off! I believe that this technique is the
"missing link" to fire by ice.
The results are obvious from the photo above. Below
are a number of things that I tried, and lessons that I learned: |
| |
| Making the Perfect Ice Sphere |
| |
|
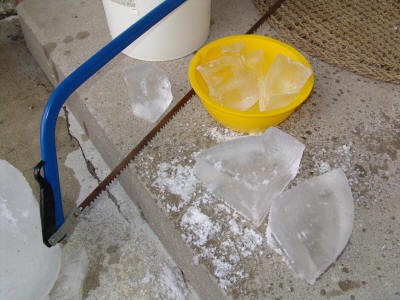 |
I "just
happened" to have a few buckets of ice in the
garage.
As in Ice #3, this was just plain tap-water that
was left in winter temperatures to freeze.
Of course, much of the ice was cloudy, but the
top and edges were quite clear.
I sawed off the clear sections. |
|
|
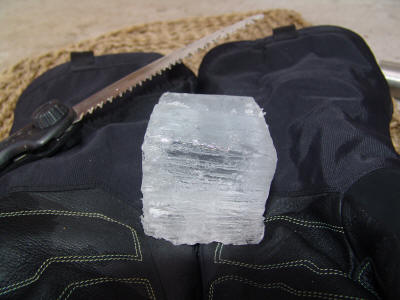 |
One technique
is to start by making a rough cube. |
|
|
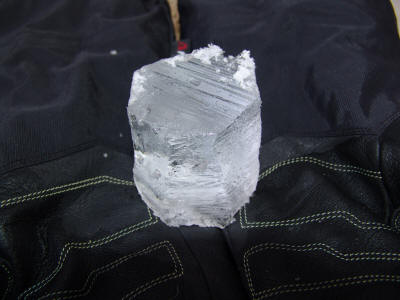 |
The next step
is to cut off the edges of the cube to form an
octagonal shape.
|
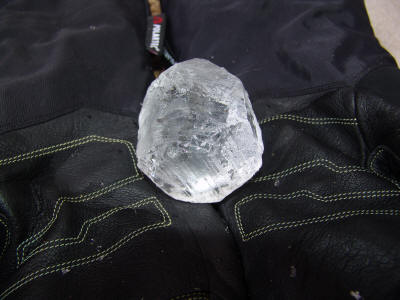 |
Then round
off the top and bottom. |
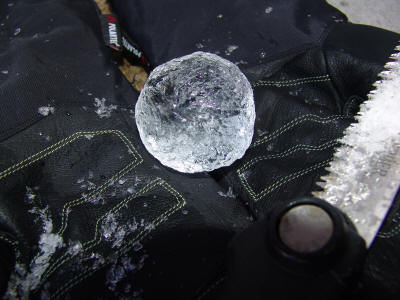 |
Now cut away
to any bumps or irregularities that don't look like
a sphere. |
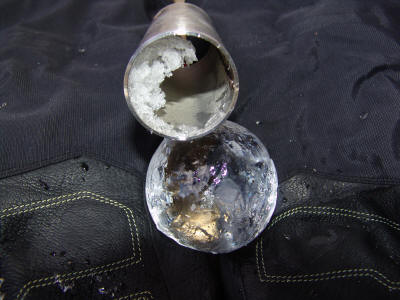 |
Now for the
magic!
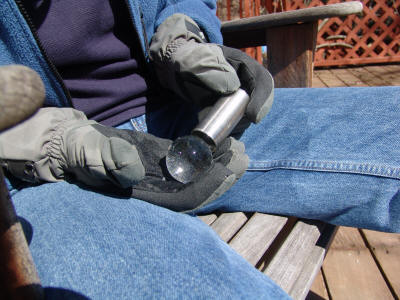
By taking a tube, and rubbing it over the surface
of the rough sphere, we start to cut/polish away at
any irregularities.
As Nelson pointed out, with this technique, "you
can't go wrong." If you use a true random
motion in the polishing, then you have no choice but
to make a perfect sphere! |
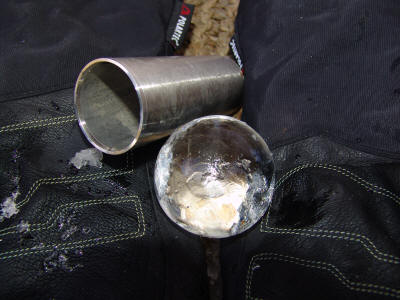 |
A few more
minutes of polishing.
Looking pretty good! |
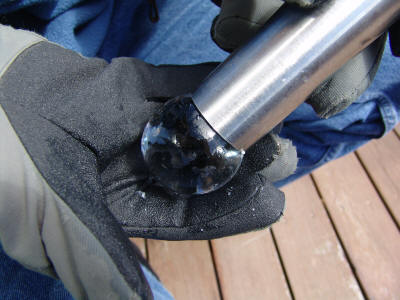 |
Getting close
to done. |
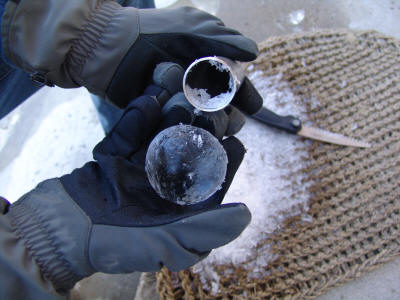 |
Wow! |
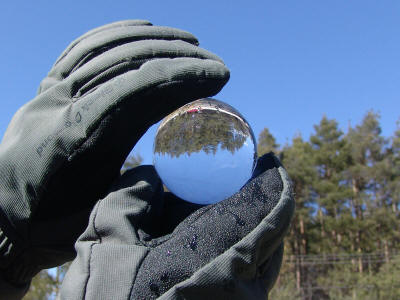 |
An almost
perfect Ice Sphere.
What does the crystal ball say, "I see fire in
your future....." |
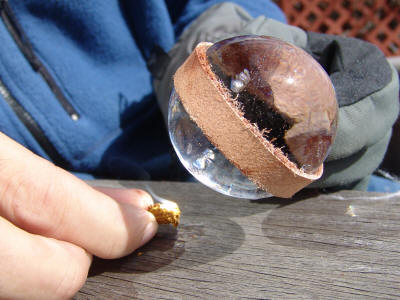 |
Here is the
ice sphere lighting a piece of tinder fungus.
A coal was generated almost instantaneously.
The sphere is being help with a strip of leather
to minimize melting. |
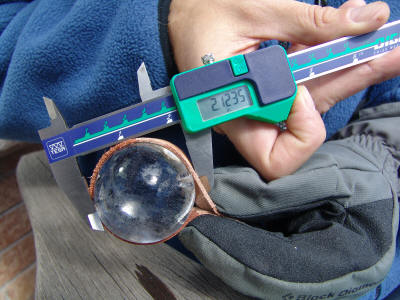 |
This sphere
was just over 2 inches in diameter. |
 |
The neat
thing about this technique is that by further
polishing, you can keep improving the shape of the
sphere - and can keep making smaller spheres.
As long as the diameter of the polishing tube is
in the right "ballpark," you can make "any" size of
sphere.
Of course there are limiting cases:
1. Where the tube slides right over the sphere.
2.The other extreme, the tube is so small that it
it difficult to keep the tube "square" on the
sphere.)
As Nelson suggested, a ratio of 1:1.5 (tube:sphere)
is a good starting point. |
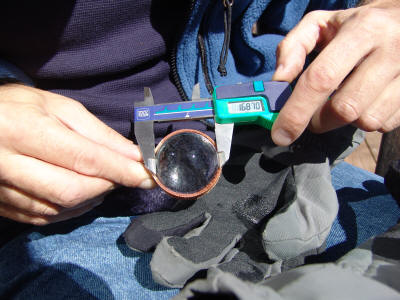 |
After some
more polishing, we are down to a 1.7" sphere. |
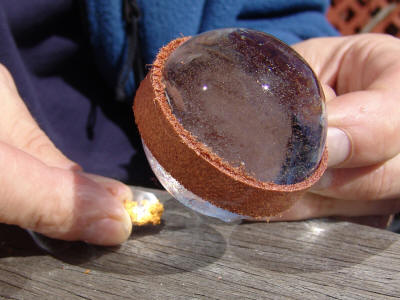 |
Still works
just fine.
Since the day was warming up, the ice started to
fracture, so I didn't get this sphere much smaller. |
|
|
|
...on to Page 2
Fire from Ice #4:
Page 1
Page 2
Page 3
Page 4 |
|
|